Apr 18, 2018

Generate Custom Report From OEM Cloud Control 13c

OEM cloud control (12c/13c) gives you amazing facility to generate custom reports like , database status report of all target databases, Backup detail of database targets from Catalog database etc.
Repository database contains all the target details and metric information . So best way is to run query against the repository database.

Here we have provided steps for generating database consolidation report. REPORTING module of OEM can be used to create any build-in or custom reports.

Enterprise à Reports à Information publisher Reports


Now you have "Information Publisher Reports" window to start to create custom reports.

ON GENERAL TAB:
CATEGORY – Compliance
SUBCATEGORY – Database Targets
TARGETS –   Select the repository database
PRIVILEGES – Run with SYSMAN privilege/ Any Super Administrator's Privillege


ELEMENTS TAB:
Select ADD :

SELECT TABLE FROM SQL:
Select Database Instance

Then, Select "Continue"

 Here paste the sql query,


COMPLETE QUERY:
SELECT A.HOST_NAME,
        A.DATABASE_NAME,
 TO_CHAR(A.STARTUP_TIME,'DD-MON-YYYY') "STARTUP_DATE" ,
        TO_CHAR(A.creation_date,'DD-MON-YYYY') "CREATION_DATE",
        A.LOG_MODE,A.CHARACTERSET,A.DBVERSION,
        AVAILABILITY_STATUS,E.SGASIZE,
 G.HOME_LOCATION "ORACLE_HOME",
 F.property_value "PORT",
 C.cpu_count,
 C.CPU_CORE_COUNT,
 SUBSTR(D.OS_SUMMARY,1,40) "OS PLATFORM"
 FROM  SYSMAN.MGMT$DB_DBNINSTANCEINFO A,
 SYSMAN.MGMT$AVAILABILITY_CURRENT B,
 SYSMAN.MGMT$DB_CPU_USAGE C ,  
 sysman.mgmt$os_hw_summary D,
 sysman.mgmt$db_sga_all E ,
 SYSMAN.MGMT$TARGET_PROPERTIES F  ,
 SYSMAN.MGMT$ORACLE_SW_ENT_TARGETS G
 WHERE B.TARGET_TYPE='oracle_database' and
 A.TARGET_NAME=B.TARGET_NAME AND
 A.TARGET_NAME=C.TARGET_NAME AND
 A.HOST_NAME=D.HOST_NAME and
 a.target_name=E.target_name  AND
 E.SGANAME='Total SGA (MB)'  AND
   A.TARGET_NAME=F.TARGET_NAME AND
   a.target_name=G.TARGET_NAME and  
   F.PROPERTY_NAME='Port'
ORDER BY host_name desc;

Note: This query you can customize as per your requirement:
Select Continue. Then select “Schedule” Tab.
Now schedule it:


You can preview the report also. Once the preview is fine, you can save it. HTML formatted report will be sent the mentioned email addresses.
Note: Check “Save copies of report” and “E-Mail Report” check boxes.


Now you can see your mail report as you scheduled.


Apr 14, 2018

Configuring the Enterprise Manager Audit System - OEM 12c/13c

Audit Log Data:
Certain security operations should be audited to ensure compliance with the various act in different counties. In the EM environment, there is auditing for both the EM application and repository database.

EM Auditing
Enterprise Manager offers over 150 options for auditing that can be configured using EMCLI but by default, it audits a few basic and infrastructure operations and this auditing cannot be turned off. The audit data is stored in the repository and the volume of this data can impact the performance of the system so it is important to externalize or archive the data at regular intervals. An API called EM_AUDIT_EXTERNALIZATION is provided to externalize the data. The data is stored in XML format and the files are named NNNNN.xml where is a configurable value and NNNNN is a number. The audit externalization service is enabled/configured using the EMCLI update_audit_settings command and the externalization of the audit data is performed by a repository job called EM Audit Externalization Service. The status of this job can be seen in Cloud Control by clicking on Setup / Manage Cloud Control / Repository.

To enable and configure the externalization of the audit data, follow the commands below:

1. Connect to the database as sysdba and create an external directory
SQL> CONNECT / AS sysdba;
SQL> CREATE DIRECTORY EM_AUDIT AS '/u01/app/oracle/em_audit';
SQL> GRANT READ,WRITE ON DIRECTORY EM_AUDIT to SYSMAN;


e.g., Connect to OMS in console mode:
$ pwd
/u01/app/oracle/oem
$ mkdir em_audit
$ cd em_audit/
$ pwd
/u01/app/oracle/oem/em_audit
$ emtst
$ sqlplus / as sysdba
SQL> CREATE DIRECTORY EM_AUDIT AS '/u01/app/oracle/oem/em_audit';
Directory created.
SQL> GRANT READ,WRITE ON DIRECTORY EM_AUDIT to SYSMAN;
Grant succeeded.
SQL>

2. Execute the command below to configure the externalization:
NOTE: be sure the select the specific operations that should be audited. Setting this to the value of “ALL” will mostly likely create more audit files than necessary.

Syntax:
emcli update_audit_settings
      -audit_switch="ENABLE/DISABLE"
      -operations_to_enable="name of the operations to enable, for all oprtations
       use ALL"
      -operations_to_disable="name of the operations to disable, for all
       oprtations use ALL"
      -externalization_switch="ENABLE/DISABLE"
      -directory_name="directory_name (DB Directory)"
      -file_prefix="file_prefix"
      -file_size="file_size (Bytes)"
      -data_retention_period="data_retention_period (Days)"

Example:
$ emcli update_audit_settings
-audit_switch="ENABLE"
-operations_to_enable="ALL"
-externalization_switch="ENABLE "
-directory="EM_AUDIT”
-file_prefix="EMAudit"
-data_retention_period="30"

3. The following command will show the settings:

The above commands will enable the externalization of the audit data using a name such as EMAudit00001.xml and will save the files in the directory /u01/app/oracle/em_audit. Once this is done, archiving of the mandatory audit records from the operating system can be done via Oracle Audit Vault or tape/disk backups. For more information, refer to the Enterprise Manager Cloud Control Security Guide.

Output: ( before enable audit) :
$ hostname
example01.company.com
$ export EMCLI_HOME=/u01/app/oracle/oem
$ export PATH=$PATH:$EMCLI_HOME/bin
$ emcli login -username=gmohapatra
Enter password :

Login successful
$ emcli show_audit_settings
User Activity Audit    : Enabled  (2 out of 171 operations)
Externalization Switch : Disabled
Directory              : Not configured
File Prefix            : em_audit
File Size              : 5000000 Bytes
Data Retention Period  : 365 Days
*Infrastructure Audit is always enabled
.................................................
$
Enabling Audit:
$ emcli show_audit_settings
User Activity Audit    : Enabled  (2 out of 171 operations)
Externalization Switch : Disabled
Directory              : Not configured
File Prefix            : em_audit
File Size              : 5000000 Bytes
Data Retention Period  : 365 Days
*Infrastructure Audit is always enabled
.................................................
$
$ emcli update_audit_settings 
-audit_switch="ENABLE" 
-operations_to_enable="ALL" 
-externalization_switch="ENABLE" 
-directory="EM_AUDIT" 
-file_prefix="EMAudit" 
-data_retention_period="30"

Successfully updated the audit settings.
$
$ emcli show_audit_settings
User Activity Audit    : Enabled  (For all Operations)
Externalization Switch : Enabled
Directory              : EM_AUDIT
File Prefix            : EMAudit
File Size              : 5000000 Bytes
Data Retention Period  : 30 Days
*Infrastructure Audit is always enabled
.................................................
$
Now Enable the Audit:
$ emcli enable_audit
Successfully enabled EM auditing.
$

Find Operations List:

emcli show_operations_list
e.g.,
$ emcli show_operations_list
Operation ID                         Operation Name                           Infrastructure Operation
ADD_AGENT_REGISTRATION_PASSWORD      Add Registration Password                 NO                     
ADD_CS_TARGET_ASSOC                  Add Standard-Target Association           NO                     
AGENT_REGISTRATION_PASSWORD_USAGE    Registration Password Usage               NO                     
AGENT_RESYNC                         Resync Agent                              NO                     
AG_AUD_CREATE                        Create Administration Groups              NO                     
AG_AUD_DELETE                        Delete Administration Groups              NO                     
AG_AUD_MODIFY                        Modify Administration Groups              NO                     
ALLOCATE_QUOTA                       Allocate quota                            NO                     
…..

Repository Database Auditing: ( As usual Database level audit):

Oracle always audits certain operations regardless of the database audit settings. This is referred to as Mandatory Auditing and the audit records are written to the operating system in the destination specified by the initialization parameter AUDIT_FILE_DEST.
Mandatory auditing includes these operations:
 » SYSDBA and SYSOPER logins
» CREATE/ALTER/DROP AUDIT POLICY
» AUDIT/NOAUDIT
» EXECUTE of the DBMS_FGA PL/SQL package
» EXECUTE of the DBMS_AUDIT_MGMT PL/SQL package
» ALTER TABLE attempts on the AUDSYS audit trail table
» Top level statements by the administrative users SYS, SYSDBA, SYSOPER, SYSASM, SYSBACKUP, SYSDG, and SYSKM, until the database opens. When the database opens, Oracle Database audits these users using the audit configurations in the system.
» All configuration changes that are made to Oracle Database Vault

The agent that resides on each OMS server logs into the repository every few minutes for self monitoring and generates an audit record for each login. Therefore, it is very important that the audit records are regularly archived and purged. The steps for doing this may vary according to a company’s security requirements but a sample setup is provided below.

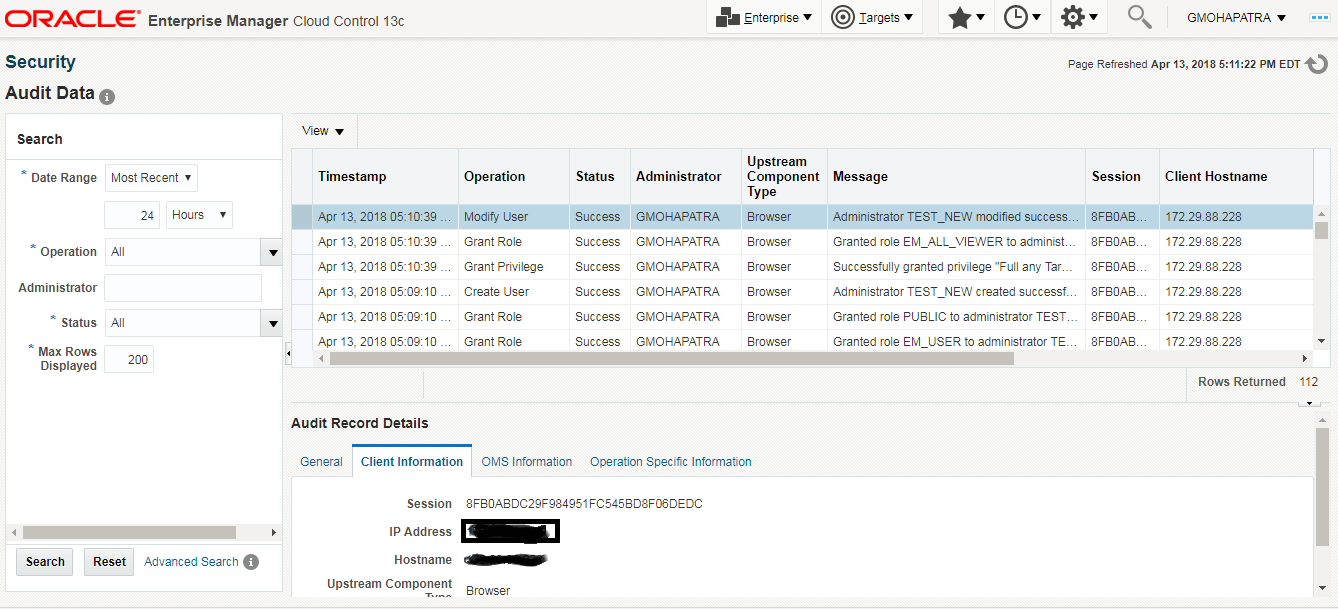
Searching the Audit Data

You can search for audit data that has been generated over a specified period. You can also search for the following:

  • Audit details of a specific user operation or all user operations
  • Audit details of operations with a Success or Failure status or All operations.
From the Setup menu, select Security and then Audit Data. The Audit Data page is displayed. Specify the search criteria in the fields and click Go. The results are displayed in the Summary table.
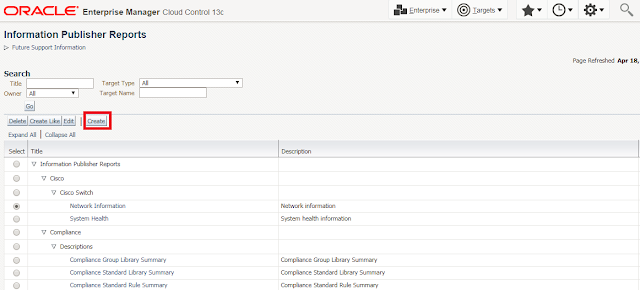


Taking reports:
How can I take daily / weekly / monthly reports related to these reports? 

Navigate to above page in EM console to check the history of the EM user audits 

setup --> security --> audit data --> On the self of screen there is Search option 


Search with the Data Range as per your requirement "Most Recent" and "Time Interval" 

Frequently asked question:

Question: When .xml files grow in "em_audit" ( created folder for directory), can we delete older .xml files rather than reducing retention in case of file system full situations?  Or any thing to do? 

Ans: It is recommended to not to delete the files directly from the file system. 
To purge the audit data from repository database and then you can remove the files. 
How to purge audit data from the repository database?
Audit logs table will be purged if audit externalization job is executed and externalization switch is enabled.

EM Audit Externalization Service job is responsible for audit data purging. This DBMS Job is scheduled to run daily to export the audit data from the table SYSMAN.MGMT$AUDIT_LOG to xml files. Xml files with the format omsmyomshost_YYYY-MM-DD-xxxxx.xml will be created in the audit directory (example: EM_DIR) specified using emcli update_audit_settings command. The file size will not exceed 10000 bytes.
Setup --> Manage Cloud Control --> Repository -->


 Purge the records Manually:
This can be done manually or via a purge job that performs the purge at a specified time interval. The recommendation is to setup a job that will purge the records at a specified time interval and is the approach in the example shown below. Note that purging a large audit trail can take time to complete so it is wise to schedule the job so that it runs during a time when the database is not too busy. For further details on the process and an explanation for each parameter used in the example, refer to the Database Security Guide.
1. Initialize the audit trail cleanup operation.
SQL> begin
dbms_audit_mgmt.init_cleanup
( AUDIT_TRAIL_TYPE => DBMS_AUDIT_MGMT.AUDIT_TRAIL_ALL,
DEFAULT_CLEANUP_INTERVAL => 12);
end;
/

2. Setup an archive timestamp for the audit records. The RAC_INSTANCE_NUMBER refers to the instance number when using a RAC database. This must be set for each instance since the mandatory audit records are stored on the operating system and therefore for each instance. If this is a standalone database, use the number 0.
-- In Rac
SQL> begin
DBMS_AUDIT_MGMT.SET_LAST_ARCHIVE_TIMESTAMP
(AUDIT_TRAIL_TYPE => DBMS_AUDIT_MGMT.AUDIT_TRAIL_OS,
LAST_ARCHIVE_TIME => TO_DATE('2018-04-15 09:00:00','YYYY-MM-DD HH:MI:SS'), RAC_INSTANCE_NUMBER => 1);
END;
/
-- In Stand-alone
SQL> begin
DBMS_AUDIT_MGMT.SET_LAST_ARCHIVE_TIMESTAMP
(AUDIT_TRAIL_TYPE => DBMS_AUDIT_MGMT.AUDIT_TRAIL_OS,
LAST_ARCHIVE_TIME => TO_DATE('2018-04-15 09:00:00','YYYY-MM-DD HH:MI:SS'), RAC_INSTANCE_NUMBER => 0);
END;
/

3. Create and schedule the purge job
SQL> BEGIN
DBMS_AUDIT_MGMT.CREATE_PURGE_JOB
( AUDIT_TRAIL_TYPE => DBMS_AUDIT_MGMT.AUDIT_TRAIL_ALL,
AUDIT_TRAIL_PURGE_INTERVAL => 12,
AUDIT_TRAIL_PURGE_NAME => 'Standard_Audit_Trail_Cleanup',
USE_LAST_ARCH_TIMESTAMP => TRUE);
END;
/

Reference : 
How To Manage Cloud Control Audit Data with emcli show_audit_settings and emcli update_audit_settings ( Doc ID 1499609.1 ) 
Section : How to purge audit data from the repository database? 

Apr 9, 2018

Tuning ASM re-balance operations in Oracle 12c

The new EXPLAIN WORK FOR statement in 12c measures the amount of work required for a given ASM rebalance operation and inputs the result in V$ASM_ESTIMATE dynamic view. Using the dynamic view, you can adjust the POWER LIMIT clause to improve the rebalancing operation work. For example, if you want to measure the amount of work required for adding a new ASM disk, before actually running the manual rebalance operation, you can use the following:

SQL> EXPLAIN WORK FOR ALTER DISKGROUP DG_DATA ADD DISK data_005;

SQL> SELECT est_work FROM V$ASM_ESTIMATE;

SQL> EXPLAIN WORK SET STATEMENT_ID='ADD_DISK' FOR ALTER DISKGROUP DG_DATA AD DISK data_005;

SQL> SELECT est_work FROM V$ASM_ESTIMATE WHERE STATEMENT_ID = 'ADD_DISK’;

You can adjust the POWER limit based on the output you get from the dynamic view to improve the rebalancing operations.


How to see Rebalance Limit:

$ sqlplus / as sysasm
Connected to:
Oracle Database 12c Enterprise Edition Release 12.1.0.2.0 - 64bit Production
With the Real Application Clusters and Automatic Storage Management options

SQL> show parameter power;

NAME                                 TYPE                              VALUE
------------------------------------ --------------------------------- -------------
asm_power_limit                      integer                           1
SQL> 

How to Increase the Limit:

SQL> alter diskgroup DATA1 drop disk DATA1_disk16;

SQL> select INST_ID, OPERATION, STATE, POWER, SOFAR, EST_WORK, EST_RATE, EST_MINUTES from GV$ASM_OPERATION where GROUP_NUMBER=1;

   INST_ID OPERA STAT      POWER      SOFAR   EST_WORK   EST_RATE EST_MINUTES
---------- ----- ---- ---------- ---------- ---------- ---------- -----------
         3 REBAL WAIT          1
         2 REBAL RUN           1        516      53736       2012          26
         4 REBAL WAIT          1

SQL> alter diskgroup DATA1 add disk '/o/*/DATA1_disk16' rebalance power 10;

SQL> select INST_ID, OPERATION, STATE, POWER, SOFAR, EST_WORK, EST_RATE, EST_MINUTES from GV$ASM_OPERATION where GROUP_NUMBER=1;

   INST_ID OPERA STAT      POWER      SOFAR   EST_WORK   EST_RATE EST_MINUTES
---------- ----- ---- ---------- ---------- ---------- ---------- -----------
         3 REBAL WAIT         10
         4 REBAL WAIT         10
         2 REBAL RUN          10      98271      98305       7919           0

You can verify from respective asm trace file:

Apr 5, 2018

Enable Unified Auditing in the Oracle Database

About Unified Auditing:
It is new with Oracle 12c. A unified audit trail ensures that the audit information is consistently formatted and contains consistent fields. Database auditing in 12c can be integrated with the Oracle Audit Vault and Database Firewall, used to control and monitor SQL network activity.

Click here to read more...

Enable Unified audit for Exiting Database:

Step: 1 - Login
Login as "oracle" from OS user

Step: 2 - Export Oracle Home and Path

$ export ORACLE_HOME=/u01/app/oracle/product/12.2.0.1/dbhome_1
$ export PATH=/bin:/usr/bin

Step: 3 - Shutdown the database

SQL> shutdown immediate
Database closed.
Database dismounted.
ORACLE instance shut down.


Step: 4 - Relink the oracle binaries to turn pure Unified Auditing on

$ cd $ORACLE_HOME/rdbms/lib
$ make -f ins_rdbms.mk uniaud_on ioracle

Step: 5 - Start the Database:

SQL> startup
ORACLE instance started.


Step:6 - Verify

SQL> select VALUE from V$OPTION where PARAMETER='Unified Auditing';

VALUE
--------------------
TRUE


Performance Impact on Unified audit enable:

Write Mode:

For performance reasons unified auditing uses a queued-write mechanism, so audited actions are written to the SGA and periodically pushed out to disk. This can result in loss of audit records during an instance crash, since the records may not be pushed out to disk before the instance fails. If this represents a problem, the write mode can be altered to immediate-write, so the audit actions are pushed directly to disk, but this will result in auditing having a greater overhead. The following code shows how to switch between these two modes. In a multitenant environment, these setting are container-specific.

-- Switch to immediate-write.

BEGIN
  DBMS_AUDIT_MGMT.set_audit_trail_property(
    audit_trail_type           => DBMS_AUDIT_MGMT.audit_trail_unified,
    audit_trail_property       => DBMS_AUDIT_MGMT.audit_trail_write_mode, 
    audit_trail_property_value => DBMS_AUDIT_MGMT.audit_trail_immediate_write
  );
END;
/

-- Switched to queued-write

BEGIN
  DBMS_AUDIT_MGMT.set_audit_trail_property(
    audit_trail_type           => DBMS_AUDIT_MGMT.audit_trail_unified,
    audit_trail_property       => DBMS_AUDIT_MGMT.audit_trail_write_mode, 
    audit_trail_property_value => DBMS_AUDIT_MGMT.audit_trail_queued_write
  );
END;
/

The size of the queue in the SGA is controlled by the UNIFIED_AUDIT_SGA_QUEUE_SIZE initialization parameter, which can be set to values between 1-30MB, with the default being 1MB. Each RAC instance can have a different value.

As a consequence of running in queued-write mode, in some cases, especially while testing or before maintenance, it may be necessary to flush audit records to the audit trail. This can be done using the FLUSH_UNIFIED_AUDIT_TRAIL procedure. It accepts the FLUSH_TYPE and CONTAINER parameters, which allow the following variations.

-- Flush records to audit trail for the current container in the current instance

EXEC DBMS_AUDIT_MGMT.flush_unified_audit_trail;

EXEC DBMS_AUDIT_MGMT.flush_unified_audit_trail(flush_type => DBMS_AUDIT_MGMT.flush_current_instance);

EXEC DBMS_AUDIT_MGMT.flush_unified_audit_trail(container => DBMS_AUDIT_MGMT.container_current);

BEGIN
  DBMS_AUDIT_MGMT.flush_unified_audit_trail(
    flush_type => DBMS_AUDIT_MGMT.flush_current_instance,
    container  => DBMS_AUDIT_MGMT.container_current);
END;
/

-- Flush records to audit trail for all containers in the current instance.
-- Must be run from root container.

EXEC DBMS_AUDIT_MGMT.flush_unified_audit_trail(container => DBMS_AUDIT_MGMT.container_all);

BEGIN
  DBMS_AUDIT_MGMT.flush_unified_audit_trail(
    flush_type => DBMS_AUDIT_MGMT.flush_current_instance,
    container  => DBMS_AUDIT_MGMT.container_all);
END;
/

-- Flush records to audit trail for the all RAC instances. Current Container.
EXEC DBMS_AUDIT_MGMT.flush_unified_audit_trail(flush_type => DBMS_AUDIT_MGMT.flush_all_instances);

BEGIN
  DBMS_AUDIT_MGMT.flush_unified_audit_trail(
    flush_type => DBMS_AUDIT_MGMT.flush_all_instances,
    container  => DBMS_AUDIT_MGMT.container_current);
END;
/

-- Flush records to audit trail for the all RAC instances. All Containers.
-- Must be run from root container.
BEGIN
  DBMS_AUDIT_MGMT.flush_unified_audit_trail(
    flush_type => DBMS_AUDIT_MGMT.flush_all_instances,
    container  => DBMS_AUDIT_MGMT.container_all);
END;
/

Purging the Unified Audit Trail;

Oracle 11g Release 2 introduced the DBMS_AUDIT_MGMT package to manage the audit trail. Oracle 12c uses the same functionality to archive and purge the unified audit trail, described here, with the addition of constants to identify the unified audit trail. For mixed mode auditing environments, remember to manage both the conventional audit trails as well as the unified audit trail.

The following example shows how to set the last archived time for the unified audit trail and manually purge audit records older than that time. Remember to archive records before purging them if you need to store them long term.

-- Set the last archive timestamp.
BEGIN
  DBMS_AUDIT_MGMT.set_last_archive_timestamp(
    audit_trail_type     => DBMS_AUDIT_MGMT.audit_trail_unified,
    last_archive_time    => SYSTIMESTAMP-5,
    --rac_instance_number  =>  1,
    container            => DBMS_AUDIT_MGMT.container_current
  );
END;
/

-- Check the new setting.
COLUMN audit_trail FORMAT A20
COLUMN last_archive_ts FORMAT A40

SELECT audit_trail,last_archive_ts
FROM   dba_audit_mgmt_last_arch_ts;

AUDIT_TRAIL          LAST_ARCHIVE_TS
-------------------- ----------------------------------------
UNIFIED AUDIT TRAIL  17-AUG-18 12.15.16.000000 +00:00

SQL>

-- Manually purge the audit trail to the last archive timestamp.

SQL> SELECT COUNT(*) FROM unified_audit_trail;

  COUNT(*)
----------
        6757

SQL>

BEGIN
  DBMS_AUDIT_MGMT.clean_audit_trail(
   audit_trail_type        => DBMS_AUDIT_MGMT.audit_trail_unified,
   use_last_arch_timestamp => TRUE);
END;
/

SELECT COUNT(*) FROM unified_audit_trail;

  COUNT(*)
----------
         3

SQL>

Translate >>